Zadig
Zadig 2.0 - User Guide
In its simplest mode of operation, Zadig is meant to install a libusb compatible driver, for a device that does not yet have such a driver installed.
Below is an overview for a typical driver installation:
- On Windows Vista or later, the first screen you will see when launching Zadig is the User Account Control prompt displayed below. This is because the application needs to run with administrative privileges. To be able to install a driver, you should answer Yes.
On Windows XP or earlier, no security prompt will appear.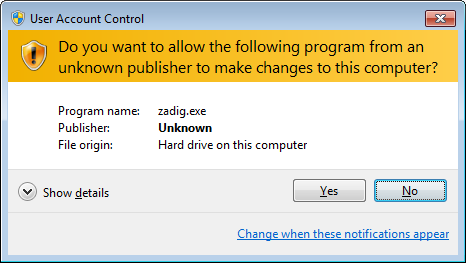
- With the application running, you should see your USB device appear in the dropdown list (click on the dropdown to see all devices).
You can also plug your USB device after Zadig is running, as the list is refreshed automatically. When possible, we recommend that you leave only the device you want to install a driver for, and unplug any other USB device.
The Vendor ID (VID, here0x045E), Product ID (PID, here0x289) and (optionally) Interface ID (MI) are also displayed under "USD ID" for your reference. If you leave your mouse over the Vendor ID, you should get the full name of the Vendor displayed. If the Vendor Name cannot be determined, and you know it, you are invited to report it to the USB ID Repository using the new button that will appear then.
HELP! MY DEVICE DOES NOT APPEAR IN THE LIST!!
If you cannot see your device listed, then it probably means that it already has a driver installed, in which case you need to be very cautious about replacing it, as other applications or the OS itself may no longer be able to access it afterwards. For instance, if you replace the existing driver for an USB keyboard or mouse, it will no longer be usable for input in Windows but instead will only work with a custom application, which is probably not what you want.
To see USB devices that already have a driver installed, go to the Options menu and select List All Devices.
Below is an example of what you would see for an USB mouse, with the HidUsb driver already installed: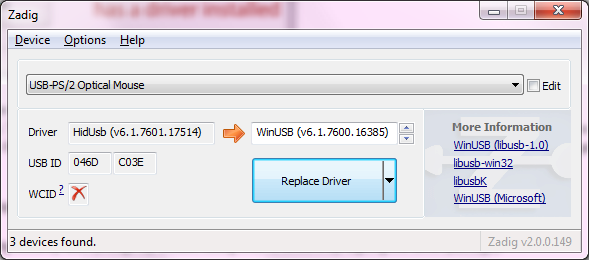
- (Optional) With your device selected, you can edit its name if the default doesn't suit your needs by clicking the Edit checkbox.
You can enter a description in the language of your choice. The description you enter here is how the device will appear in Device Manager and other locations.
You can also select the driver you want to install, betweenWinUSB,libusb-win32/libusb0andlibusbK, depending on the type of application you plan to use. Currently, any of those drivers can be used for libusb, or LibusbDotNet, whereaslibusb-win32can be used for applications based on the library of the same name.
- Once you are satisfied with the selection and device description, simply click the Install Driver Button. Note that the label of this button may change according to the operation you are about to perform. You can also use the split part of the installation button to choose a different operation than the default one, such as extracting the driver files rather than installing them, performing the one-off installation of a WCID Device driver or installing/uninstalling the libusb-win32 filter driver.
- On Vista or later, you may get the following security alert if Zadig was unable to sign the driver Catalog File (which shouldn't happen) or if you deliberately disabled Catalog File operations in the Option menu. In standard operation mode, this prompt will never display.
 If that is the case, you should select Install this driver software anyway.
- Once the installation is started, just wait until it completes. Normally, the installation process takes a matter of seconds, but in some circumstances, if the local system policies cannot be temporarily overridden to disable the creation of a system restore point, it may take a lot longer. You will be notified once the installation is complete.
- If the installation was successful, you should end up with something similar to this:
 Notice how the driver is now being displayed (in green) and indicates WinUSB. WinUSB is one of the drivers supported by libusb-1.0.
If the driver has been installed successfully, you should now be able to use your device with a libusb based application.
For power users, Zadig offers the following list of features:
-
Advanced Mode (Options → Advanced Mode):
In this mode, additional information is displayed, and users also have the ability to select the directory where the files should be extracted.
-
Setting of the options through an INI file:
All the options that can be set in the menus can also be set from a zadig.ini file, which Zadig attempts to read when started. An example of such an ini file is provided below.
-
Info/Log:
In Advanced Mode, you can also select the log level appearing in the logging window by going to Options → Log Level. If you want to find out more about what the installation process is doing, or report an issue, make sure you run your driver installation with a sufficient log level.
-
Automated Creation/Signing of a Catalog file (Options → Create a Catalog File / Options → Sign Catalog & Install Autogenerated Certificate):
Depending on whether these options are enabled, and when using the default drivers, Zadig will automatically generate a Catalog (.cat) file, as well as sign it with a unique self-signed certificate generated on the fly, which is then installed on the current machine during file extraction
-
Fine control over devices listed (Options → List All Devices / Options → Ignore Hubs or Composite Parents):
By default, Zadig only lists devices that don't have a driver installed. In some situations however, you might want to replace an existing driver, including the ones for USB hubs (usbhub.sys) or Composite Parent (usbccgp.sys). These options allow you to do just that.
-
Create New (Device → Create New Device):
In the case where you want to install a driver for a device that is not yet plugged, and for which you have the relevant information (VID, PID, etc.), you can select the Create New option and run the installation process so that the next time the device is plugged, the driver will be available.
-
Open Preset (Device → Load Preset Device):
Similar to the Create New option above, but using a zadig preset device config file. For an example of such a file, see below.
# Sample ini file for Zadig

[general]
  # Start application in advanced mode (default = false)
  advanced_mode = true
  # Exit application upon successful driver installation (default = false)
  exit_on_success = false
  # Log level (0=debug, 1=info, 2=warning, 3=error)
  log_level = 0

[device]
  # List all devices, including the ones that already have a driver (default = false)
  list_all = true
  # Include hubs and composite parent devices when listing all (default = false)
  include_hubs = true
  # Trim trailing whitespaces from the USB device description (default = false)
  trim_whitespaces = true

[driver]
  # Select the following as the default driver to install:
  # WinUSB = 0, libusb0.sys = 1, libusbK.sys = 2, Custom = 3 (default = WinUSB)
  default_driver = 2
  # Extract driver files only, don't install (default = false)
  extract_only = false
  # Set the default destination directory for extraction of the driver files (default = "C:\\usb_driver")
  default_dir = "C:\\usb_driver"

[security]
  # If embedded, install the following certificate to the Trusted Publisher store
  # install_cert = "mycert.cer"
  # If set to true, will silently install the cert provided above (not recommended)
  # disable_cert_install_warning = false
# This is a sample preset device configuration for Zadig
[device]
  Description = "Sample Device"
  VID = 0xABCD
  PID = 0x1234
  MI = 0x01
# You can also force a specific Device Interface GUID as follows
# GUID = "{11111111-2222-3333-4444-555555555555}"
Copyright © 2012-2024 Pete Batard
